earth_america
user_standard Log on
action_search_stroke
earth_america
Log on to rate and give feedback 1 2 3 4 5 Log on to rate
0
How to

How to


Products: SpaceLogic Sensor
Functionalities: Hardware, Touchscreen
Product version: 3.3, 2022
7/23/2021

Turning the Lights On and Off

In the SpaceLogic Sensor Touchscreen Display model, you turn lights on and off in order to increase or decrease living space illumination and conserve energy. You enable this feature using the Allow light control property in the Display object. You then use the Toggle lights , Button (1-12) function in the Button and Scene Configuration page to toggle the lights on and off. You can also use the Lighting mode property to allow the integrator to perform a Digital toggle for the lighting control menu as described here.

Show More
action_close

You use the SpaceLogic Sensor Display property tabs in WorkStation to view and configure the UI features of the various sensor models within your control application.

Property Tabs

The Display Basic tab properties includes the same General Information you find on all EcoStruxure Building Operation objects. Beyond that, it also provides a Setpoint , a Fan speed , an Occupancy override , an HVAC mode , a Heating cooling status , and 4 Custom value text fields. In addition, there are several properties that allow you to control the temperature display. For example, the Temperature display mode allows you to configure the temperature value displayed on the SpaceLogic Sensor display in its passive display state with the following settings:

  • Live Temperature : Displays the space temperature measured by the SpaceLogic sensors internal temperature sensor

  • Temperature setpoint : Displays the current setpoint temperature value

  • Custom temperature : Displays the value of the Custom temperature property

The Custom temperature property then allows you to display any value in the temperature range, either by referencing another temperature source (for example, an external temperature sensor) or by setting it manually in the Custom temperature field (warm start retained only).

Advanced Tab

The Display Advanced property tab includes considerably more configuration information. For example, you turn on the Allow menu page property to display all submenus including the Functions menu and any of its submenus. Should you wish, you can enable the temperature setpoint feature by setting the Display object Allow setpoint changes property to On and configuring the Setpoint high limit and Setpoint low limit properties. If colored wall back lighting feedback is required for the room occupant, you can turn on the Enable wall back lighting property.

Note:

Allow setpoint changes, Setpoint high limit, and Setpoint low limit are the types of properties you may wish to drive dynamically based on time of day. For example, using a schedule, you may only allow setpoint changes during the day and not at night. You may also only change the high and low limits for the setpoint based on whether you are in the heating or cooling season.

You can also enable lighting and blind control functions using the Display object Allow light control and Allow blind control properties. Within the light function, you can toggle on and off or set a percentage to control the intensity of the lights using the Lighting mode property. Similarly, you can you can toggle on and off or set a percentage to control the blind louver sub-function using the Blind control mode property.

Button and Scene Configuration Tab

The Display Button and Scene Configuration property tab allows you to select from the available functions or scenes to program the buttons on the SpaceLogic Sensor display models. You can also select the buttons you wish to display for configured scenes and triggers for each of the scene buttons.

For more information, see Configuring SpaceLogic Sensor Display Properties .

Property Mapping

While the Display property tabs allow you to configure varied SpaceLogic Sensor models with different UI features, not all of the properties apply to each model. Be sure to consider this when configuring the application and binding it to your control programs. The table that follows shows the properties applicable to each unit.

Table: SpaceLogic Sensor and Display Object Property Mapping

Display property

Touchscreen Display

LCD Temperature Sensor

3-Button Cover

Setpoint

Yes

Yes

Yes

Fan speed

Yes

Yes

No

Occupancy override

Yes

Yes

Yes

HVAC mode

Yes

Yes

No

Selected scene

Yes

Yes

No

Light level

Yes

Yes

No

Blind position

Yes

Yes

No

Blind slat angle

Yes

Yes

No

Temperature display mode

Yes

Yes

No

Custom temperature

Yes

Yes

No

Heating cooling status

Yes

Yes

No

Show time

Yes

No

No

Time format

Yes

No

No

Show CO2

Yes

Yes

No

Show humidity

Yes

Yes

No

Temperature units

Yes

Yes

No

Allowed fan speeds

Yes

Yes

No

Enable wall back lighting

No

No

Yes

Lighting mode

Yes

Yes

No

Blind control mode

Yes

Yes

No

Blind angle mode

Yes

Yes

No

Allowed HVAC modes

Yes

Yes

No

Allow setpoint changes

Yes

Yes

Yes

Setpoint high limit

Yes

Yes

Yes

Setpoint low limit

Yes

Yes

Yes

Allow fan speed changes

Yes

Yes

No

Allow occupancy overrides

Yes

Yes

No

Allow HVAC mode changes

Yes

Yes

No

Allow menu pages

Yes

No

No

Allow sensors information pages

Yes

No

No

Allow device information page

Yes

No

No

Allow parent information page

Yes

No

No

Allow custom information page

Yes

No

No

Allow temperature unit changes

Yes

Yes

No

Allow light control

Yes

Yes

No

Allow blind control

Yes

Yes

No

Display backlight

Yes

No

No

Button (1-12) function

Yes

Yes

No

Scene button (1-8) button

Yes

Yes

No

Scene button (1-8) trigger

Yes

Yes

No

SpaceLogic Living Space Sensor / Eco mode

Yes

Yes

Yes

Show More
action_close

The SpaceLogic Sensor Display Scene Configuration page provides you with a series of icons and button identifiers to use when programming the Touchscreen Display model.

 
action_zoom_plus_stroke Scene configuration page

Scene configuration page

You use the cursor to hover over the Available Icons and identify each icon by name. You can then drag and drop an icon to assign one of the Button 1-8 locations on the SpaceLogic Sensor Display Model. For example, you may optionally use the night light icon to trigger a night scene with muted lighting in Button 1 . You would then enable that icon by choosing Scene slot 1 in the Buttons and Scene Configuration properties tab. Once you do so, Button 1 always occupies the same space on the screen for a given menu screen, such as the Front menu in the Touchscreen Display model. For more information, see SpaceLogic Sensor Touchscreen Display Model .

Note:

The Display object Button and Scene Configuration properties tab includes the same Available Icons and Scene button 1-8 IDs that display on this page. In the case of the icons, they are identified by name rather than by displaying an icon, however. For more information, see SpaceLogic Sensor Display Properties - Button and Scene Configuration Tab .

Button Assignments

You not only assign Button 1-8 on the page with an icon from the available range of icons, you also assign a scene button identifier which is a number used to tell the application what the scene should do. For more information, see Configuring SpaceLogic Sensor Display Scenes .

You can also configure the Front (Main) and Functions menu screens in the Touchscreen Display model. However, you cannot configure them as completely as you can here on the Scene Configuration page. While the Touchscreen Display menu screens allow you to assign a function to a button, the function includes an icon and the icon is not a separate configuration. For instance, the function is setpoint and always includes the setpoint icon.

Scene Selection

You can add scene selection to both the Front (Main) and Functions menu screens in the Touchscreen Display model. However, the Front and/or Functions menu buttons are still allocated a shortcut that points to Buttons 1-8. This shortcut displays the scene icon to which it points. In this way, the buttons on those pages become proxies for the scene you configure in the Display object Scene Configuration page. For more information, see Selecting the Scenes Menu .

Consider the following example for a Front menu screen with 4 buttons:

  • You configure Button 1 with the Change Setpoint function, which has both an implicit function and an implicit icon.

    By selecting the icon in this button, you access the setpoint page where the occupant can change the setpoint. For more information, see Changing the Temperature Setpoint .

  • You configure Button 2 with the Scene button 3 function, which effectively references the configuration of the scene button on the Scene Configuration page.

    That is, the icon shown in Button 2 of the Front menu page mirrors that of scene button 3 configuration. By pressing the icon in button 2 of the Front menu page, you trigger the scene configured in the scene button trigger (scene function).

To turn on an off the lights
  1. In the SpaceLogic Sensor Touchscreen model, access the lighting control menu by clicking the light bulb button. In this instance, the button is located on the Front menu screen. 

     
    action_zoom_plus_stroke
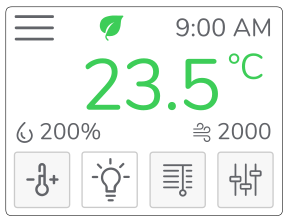
  2. In the lighting control menu, click the light bulb button to fully illuminate the lights in the room.

     
    action_zoom_plus_stroke
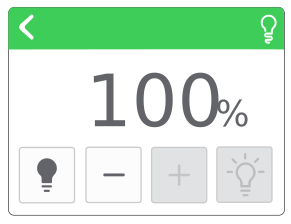
  3. Click the minus button - to fully extinguish the lights in the room.

     
    action_zoom_plus_stroke
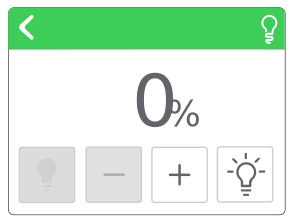
  • SpaceLogic Display Properties
  • SpaceLogic Sensor Display Scene Configuration
  • SpaceLogic Sensor Touchscreen Display Model
  • Configuring SpaceLogic Sensor Display Properties