
How to
Creating an Out of Reference Range Alarm
You create an out of reference range alarm to trigger an alarm when a variable, such as a temperature, differs from a reference value.
In WorkStation, in the System Tree pane, select the folder or SmartStruxure server where you want to create the alarm.
On the File menu, point to New and then click Alarm .
In the object type list, select Out of Reference Range Alarm .
action_zoom_plus_stroke 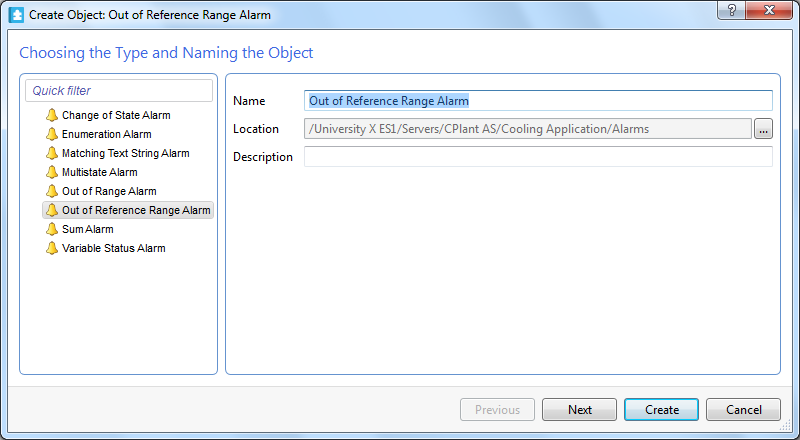
In the Name box, type a name for the alarm.
In the Description box, type a description for the alarm.
Click Next .
In the Upper deviation limit box, enter the upper limit the monitored variable is allowed to deviate from the reference variable before the alarm is triggered.
action_zoom_plus_stroke 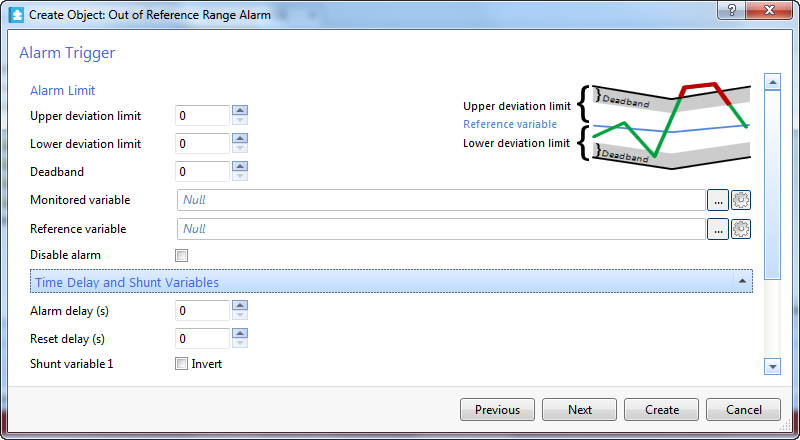
In the Lower deviation limit box, enter the lower limit the monitored variable is allowed to deviate from the reference variable before the alarm is triggered.
In the Deadband box, enter the range the monitored variable has to pass within the normal range before the alarm is reset.
In the Monitored variable box, enter the variable that the alarm monitors.
Click the Set unit button
to select the unit of measure for the alarm limits and deadband.action_zoom_plus_stroke  Note:
Note:If the monitored value has a unit of measurement defined, the alarm limits and deadband are assigned that unit by default.
Select the unit of measure.
action_zoom_plus_stroke 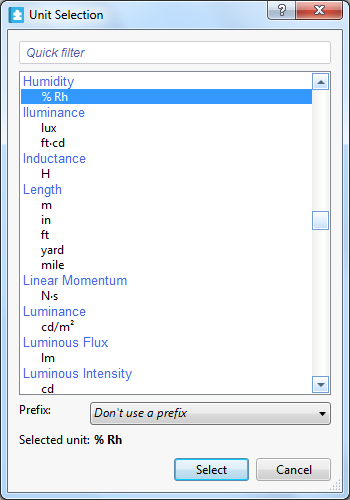
In the Prefix box, select a prefix for the unit.
Click Select .
In the Reference variable box, enter the reference variable to compare with the monitored variable.
In the Disable alarm box, select whether or not to create the alarm in disabled mode.
Under Time delay and shunt variable , in the Alarm delay box, enter the time delay before the alarm is triggered.
In the Reset delay box, enter the time delay before the alarm is reset.
Select Invert to have the alarm enabled when the first shunt variable is active.
In the Shunt variable 1 box, enter the digital variable that enables or disables the alarm.
action_zoom_plus_stroke 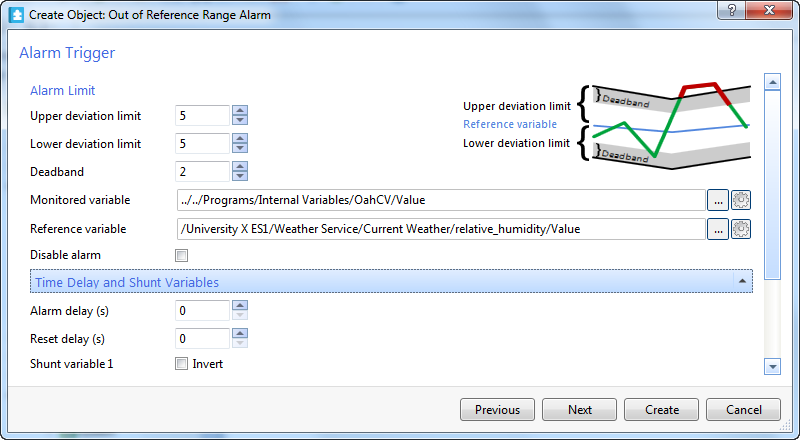
In the Operator list, select AND or OR to add logic between the first shunt variable and the second shunt variable.
Select Invert to have the alarm enabled when the second shunt variable is active.
In the Shunt variable 2 box, enter the digital variable that enables or disables the alarm.
Click Next .
In the Above upper limit message box, type the message to display when the monitored variable exceeds the upper alarm limit.
action_zoom_plus_stroke 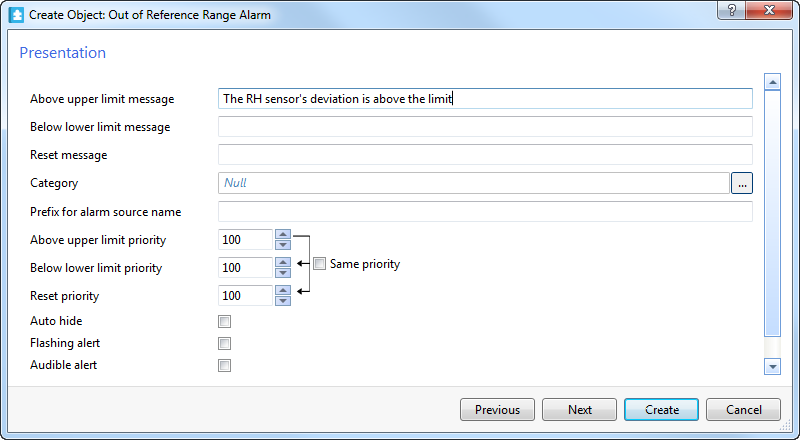
In the Below lower limit message box, type the message to display when the monitored variable falls below the lower alarm limit.
In the Reset message box, type the message to display when the alarm is reset.
In the Category box, enter the category that the alarm belongs to.
In the Prefix for alarm source name box, type a prefix that is added to the beginning of the source name property of an alarm record.
In the Above upper limit priority box, enter the priority of the alarm when the monitored variable exceeds the upper alarm limit.
Select Same priority to let all priorities inherit the value in the Above upper limit priority box.
In the Below lower limit priority box, enter the priority of the alarm when the monitored variable falls bellow the lower alarm limit.
In the Reset priority box, enter the priority for alarm when it is reset.
Select Auto hide to automatically hide the alarm from the Alarms pane or Alarm View.
Select Flashing alert to make the alarm flash in the Alarms pane and Alarm Views when it is triggered.
Select Audible alert to make a sound when the alarm is triggered.
Select Disable state-change logging to prevent an alarm state change from creating an event.
Click Next .
Select the type of acknowledgement to use:
Click No when the alarm does not need to be acknowledged.
Click Single when the alarm needs to be acknowledged once, either in the alarm state or reset state.
Click Extended when the alarm needs to be acknowledged in both the alarm state and the reset state.
action_zoom_plus_stroke 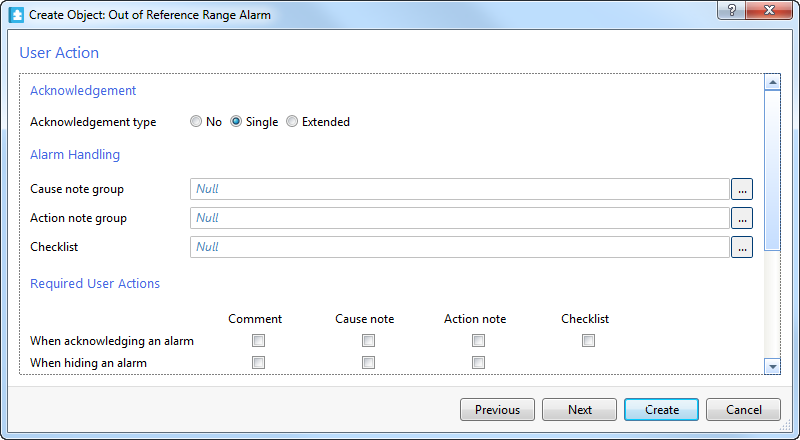
In the Cause note group box, enter the cause note group that you want to connect to the alarm.
In the Action note group box, enter the action note group that you want to connect to the alarm.
In the Checklist box, enter the checklist that you want to connect to the alarm.
Select When acknowledging an alarm: Comment to force the user to add a comment to the alarm before the alarm can be acknowledged.
Select When acknowledging an alarm: Cause note to force the user to edit the connected cause note before the alarm can be acknowledged.
Select When acknowledging an alarm: Action note to force the user to edit the connected action note before the alarm can be acknowledged.
Select When acknowledging an alarm: Checklist to force the user to go through the connected checklist before the alarm can be acknowledged.
Under Required user actions , select the actions for Comment , Cause note , and Action note to force the user to act on the listed actions.
Click Next .
Click the Add attachment button
to add an attachment to the alarm.action_zoom_plus_stroke 
action_zoom_plus_stroke 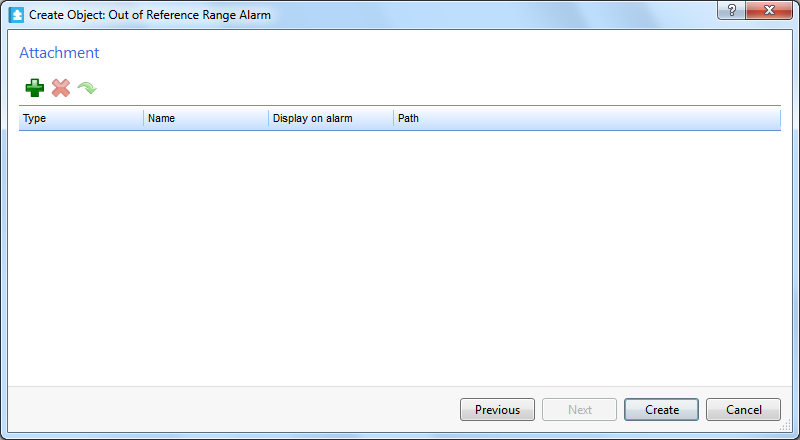
In the Select Object dialog box, select the object you want to attach to the alarm and then click Select .
On the Attachment page, in the Display on alarm column, select the check box to automatically open the attachment when the alarm is triggered.
Click Create .
Removing an Attachment from an Alarm
 Create Out of Reference Range Alarm Wizard – Alarm Trigger Page
Create Alarm Wizard – Presentation Page
Create Alarm Wizard – User Action Page
Create Alarm Wizard – Attachment Page
Create Out of Reference Range Alarm Wizard – Alarm Trigger Page
Create Alarm Wizard – Presentation Page
Create Alarm Wizard – User Action Page
Create Alarm Wizard – Attachment Page
 Out of Reference Range Alarms
Alarm States
Out of Reference Range Alarms
Alarm States