
How to
Registering an Offline System
You register a Building Operation system offline when WorkStation is not connected to the Internet. Only one account each of system integrator(Branch/Partner) and end-user can be associated to a system. The other user accounts cannot associate to the system to register it.
Ensure that you have Buildings Exchange user account.
For more information, see Creating Buildings Exchange User Account for Branch User .
For more information, see Creating Buildings Exchange User Account for Partner or End User .
Log on to WorkStation.
Click Register now .
action_zoom_plus_stroke 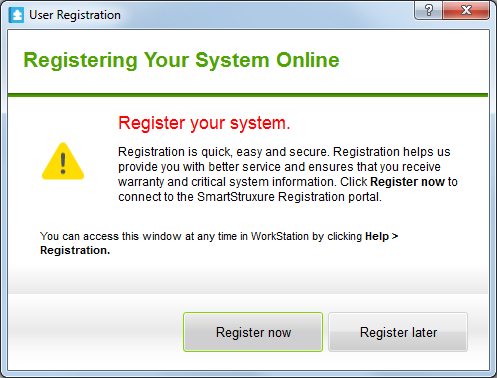
Write down the System Identifier .
action_zoom_plus_stroke 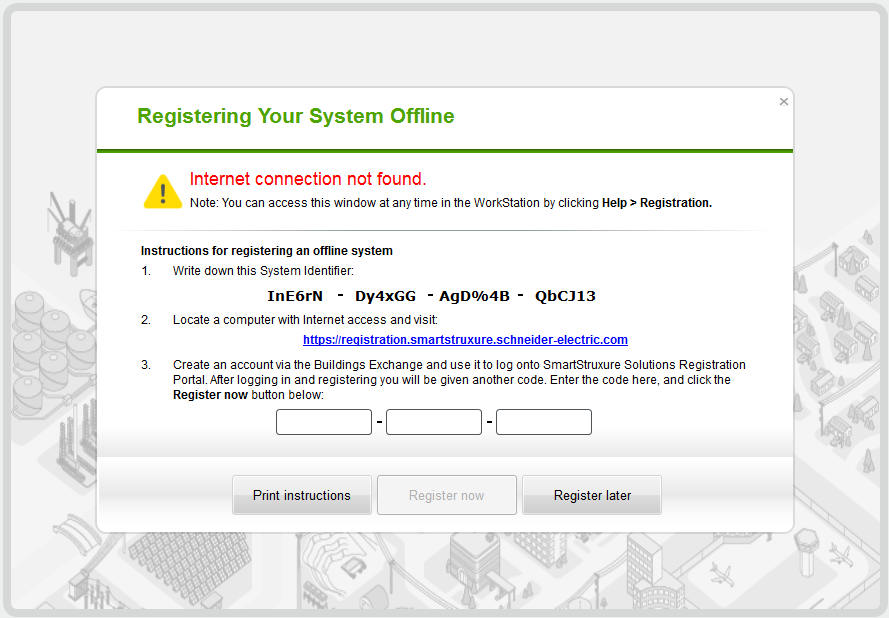
Access the URL https://registration.smartstruxure.schneider-electric.com on a computer that has Internet access.
Log on or create an account:
If you have a Buildings Exchange user account, click Log on .
To create a Buildings Exchange user account, click Create account .
action_zoom_plus_stroke 
In the Email Address box, type your email address you used to create the Buildings Exchange user account.
action_zoom_plus_stroke 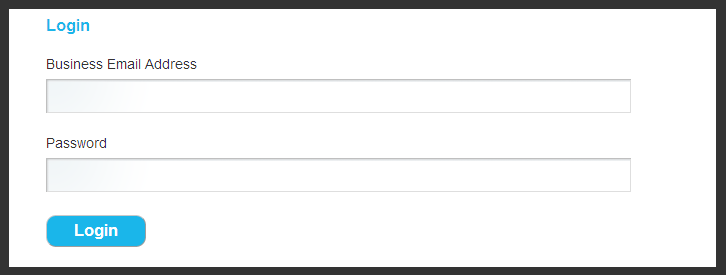
In the Password box, type the password.
Click Login .
In Register or Modify a system , enter the system ID. System ID is case-sensitive.
action_zoom_plus_stroke 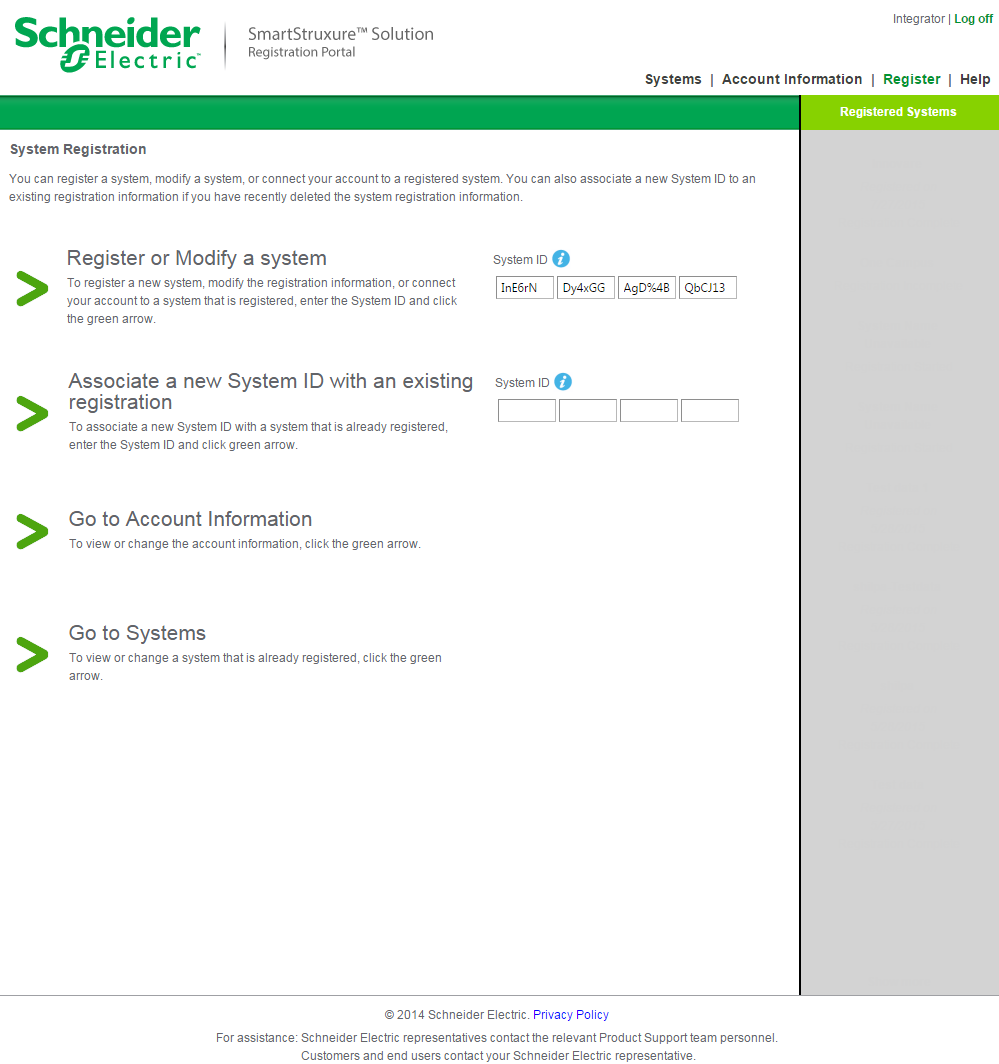
Click Register or Modify a system .
Proceed or cancel the registration:
Click Proceed to register the system if you are the authorized user.
Click Cancel to stop registering the system if you are not the authorized user.
action_zoom_plus_stroke 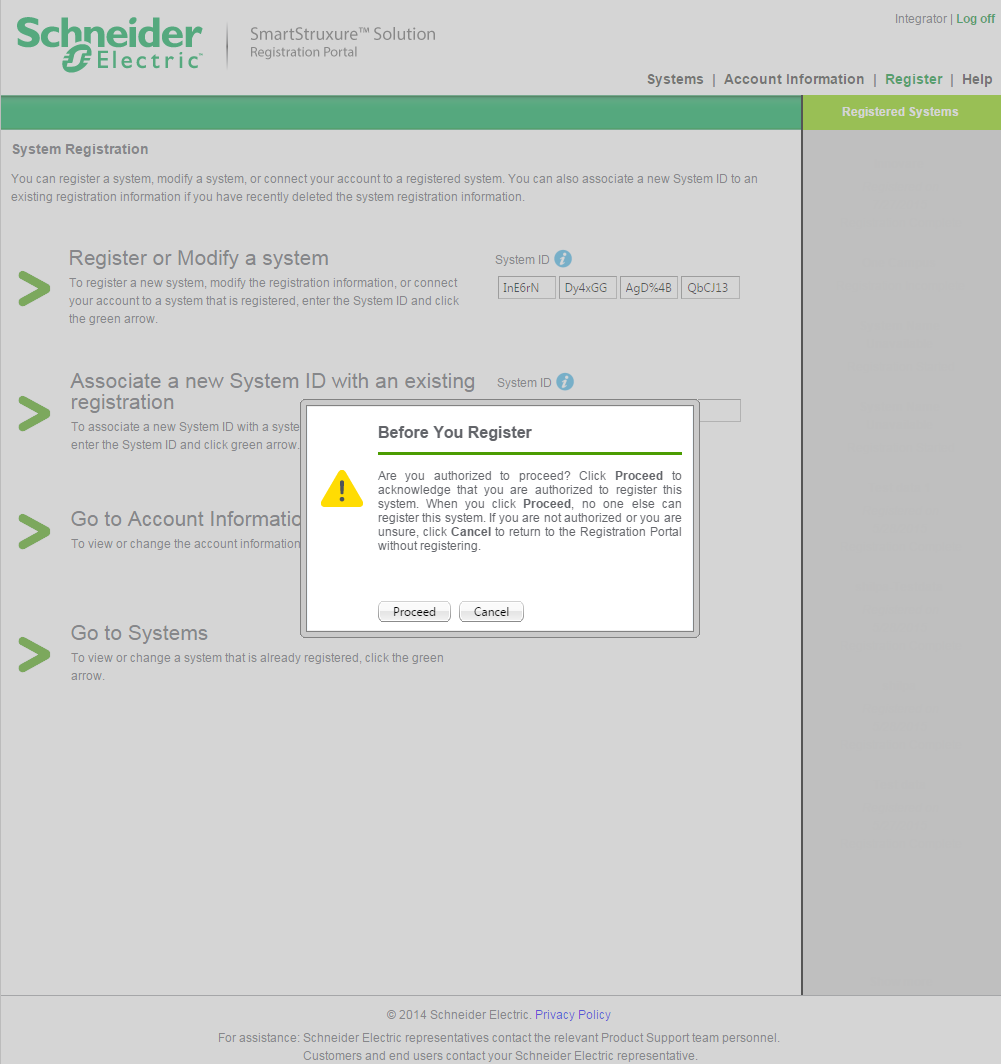
In the Site/building name box, type the site/building name where the system is being installed.
action_zoom_plus_stroke 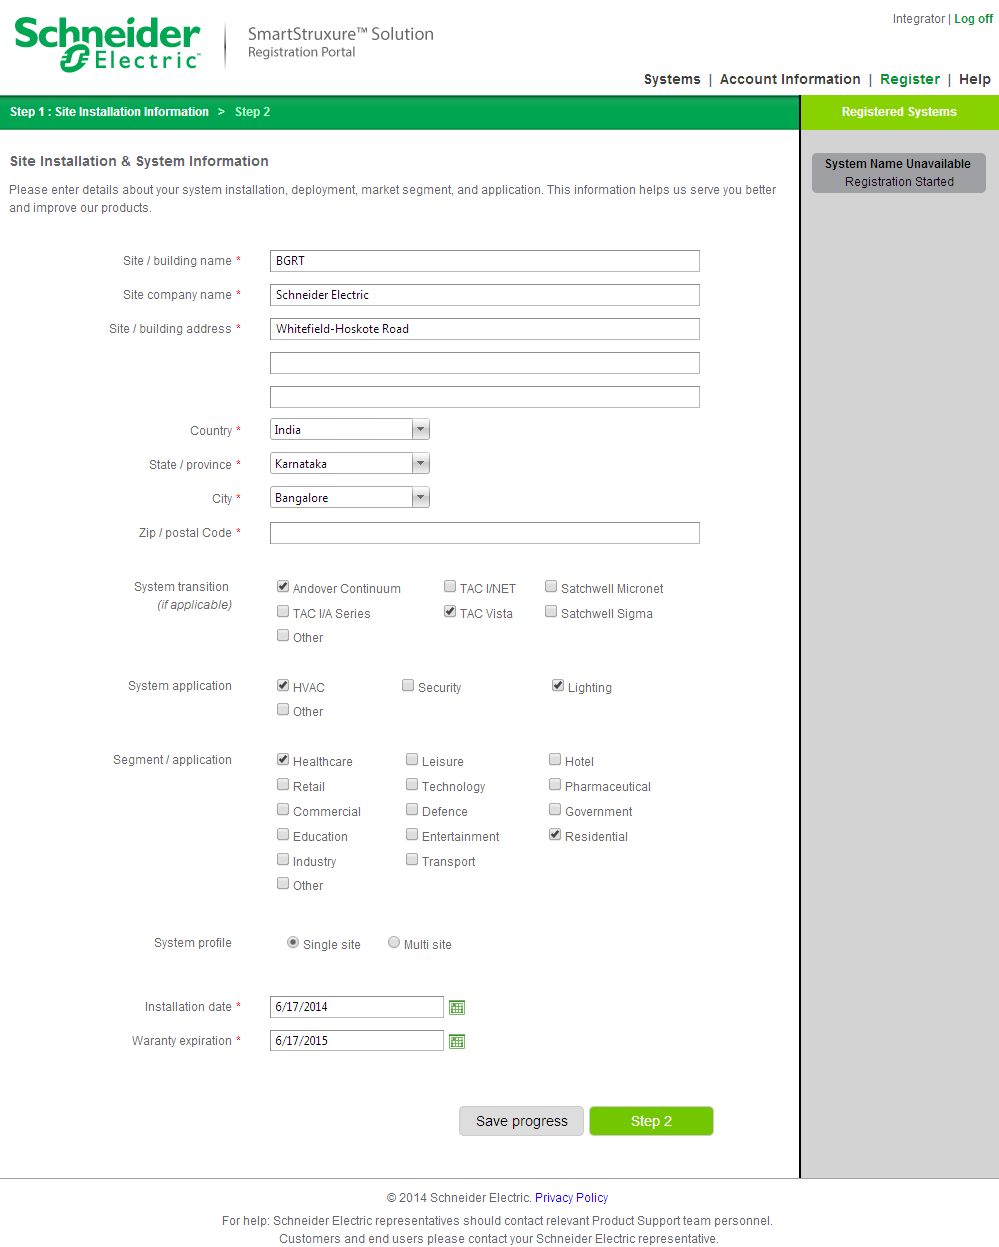
In the Site/company name box, type the company name.
In the Site/building address box, type the site/building address.
In the Country box, select the country to which site/building belongs.
In the State/province box, select the state or province to which site/building belongs.
In the City box, select the city to which site/building belongs.
In the Zip/postal code box, type the zip/postal code.
In System transition (if applicable) , select the legacy systems that existed on the site before installing Building Operation System.
In System application , select the applications to which the system is commissioned for.
In Segment/application , select the business segments you belong to.
In System profile , select the system profile.
In the Installation date box, select the date when the system was installed.
In the Waranty expiration box, select the date when the system waranty will expire.
Click Save progress .
Click Step 2 .
In the Site administrator name box, type the name of the site administrator for the system.
action_zoom_plus_stroke 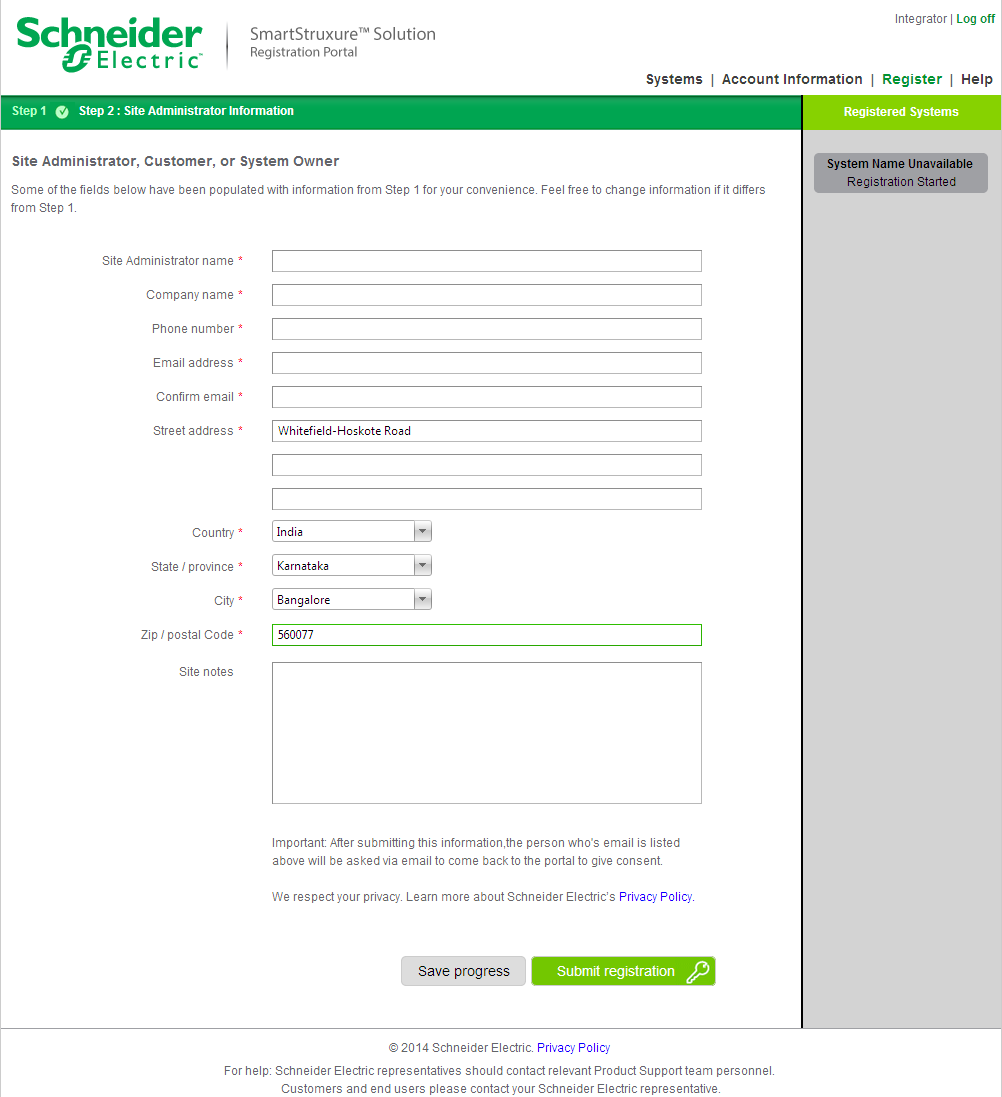
In the Company name box, type the company name of the site administrator.
In the Phone number box, type the phone number of the site administrator.
In the Email address box, type the email address of site administrator.
In the Confirm email box, type the email address again.
In the Street address box, type the street address of the site administrator.
In the Country box, select the country the site administrator belongs to.
In the State/ province box, select the state or province the site administrator belongs to.
In the City box, select the city the site administrator belongs to.
In the Zip/postal code box, type the zip/postal code.
In the Site notes box, type any information related to the site.
Click Save progress .
Click Submit registration .
Note the Registration code .
action_zoom_plus_stroke 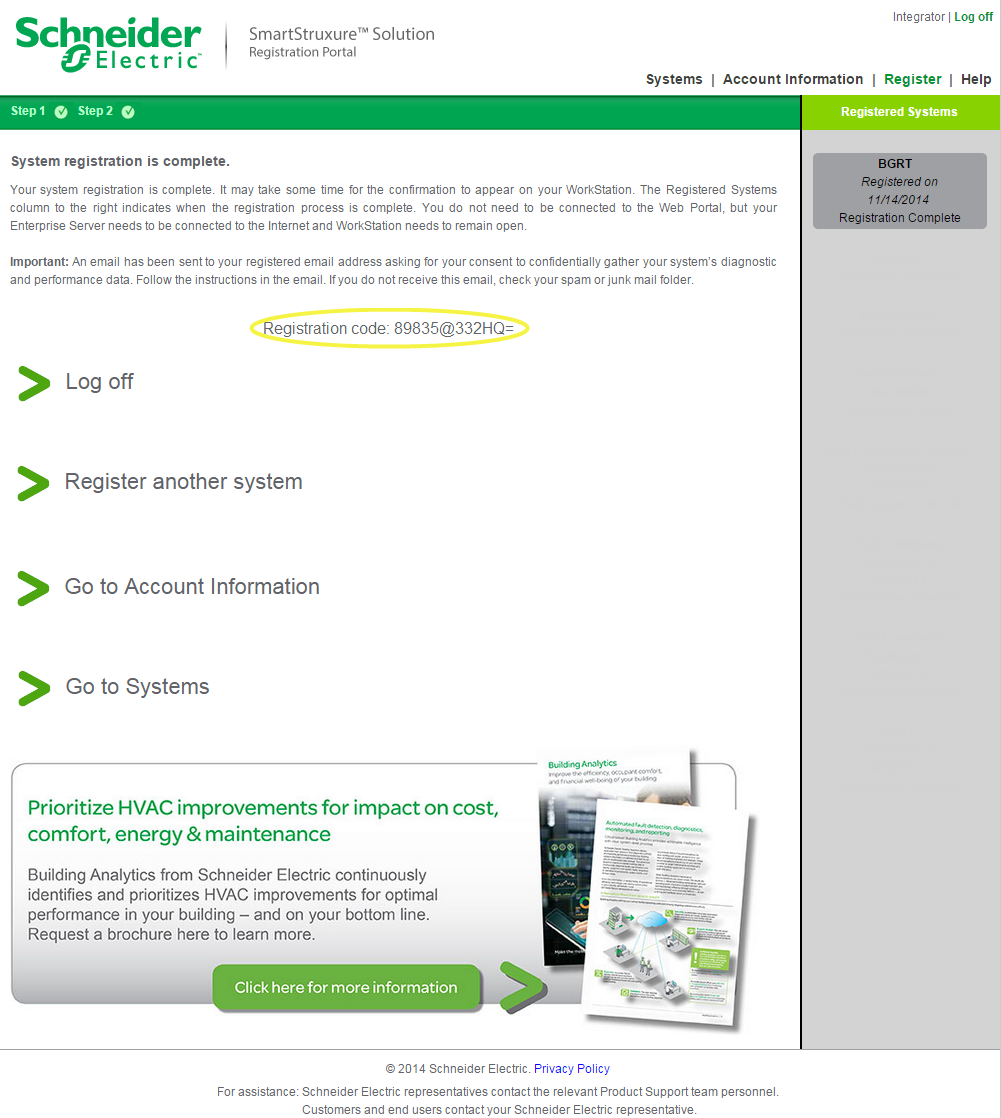
Log on to WorkStation and click Register now . Type the Registration code . Registration code is case-sensitive.
action_zoom_plus_stroke 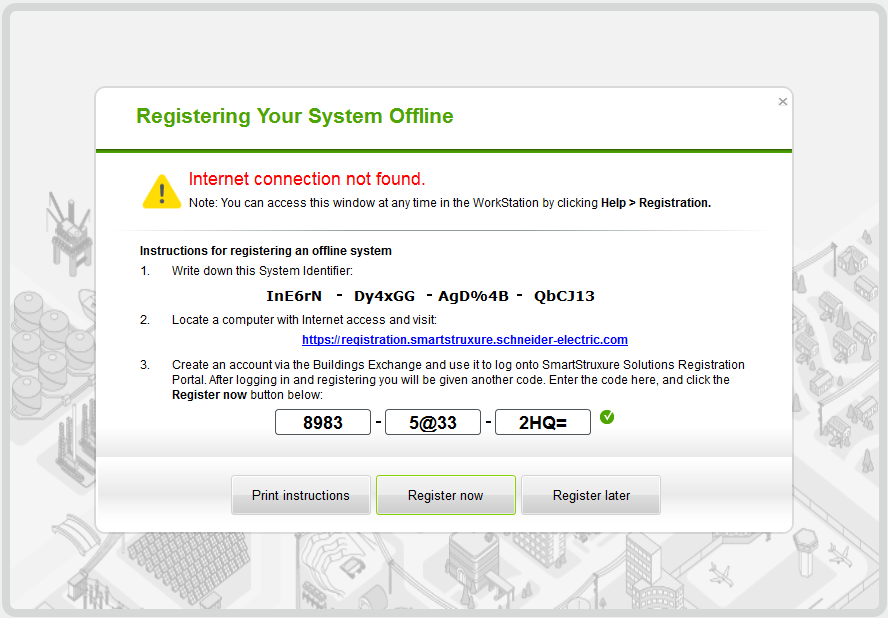
Click Register now .
 System Registration Overview
Offline Registration
Log on to WorkStation or WebStation
Log on to Registration Portal
Logging on to Registration Portal
Creating Buildings Exchange User Account for Branch User
Creating Buildings Exchange User Account for Partner or End User
System Registration Overview
Offline Registration
Log on to WorkStation or WebStation
Log on to Registration Portal
Logging on to Registration Portal
Creating Buildings Exchange User Account for Branch User
Creating Buildings Exchange User Account for Partner or End User
 Site Installation Information Page
Site Administrator Information Page
Registering Your System Offline
Registration Information Window for Offline System Registration
Viewing Updated Registration Information in WorkStation
Site Installation Information Page
Site Administrator Information Page
Registering Your System Offline
Registration Information Window for Offline System Registration
Viewing Updated Registration Information in WorkStation